Enjoy amazing discounts on handmade crafts AND MORE!

The Ultimate Guide to Vinyl Decals
Wondering what a vinyl decal actually is and how it differs from a regular sticker? Discover the step-by-step secret to applying vinyl decals flawlessly without bubbles or creases, and learn how to elevate your DIY crafts with custom designs from Create Harmonee.
TUESDAY TIPS
Harmonee
6/30/20262 min read
If you are looking to take your branding, event favors, or DIY projects to the next level, you don't have to cut them yourself. You can order custom vinyl decals from Create Harmonee! Whether you need custom text, a business logo, or intricate graphics, they can turn your vision into a professional-grade decal.
They are the perfect addition to your stash of craft supplies, allowing you to customize mugs, signs, tumblers, and virtually any smooth surface you can think of.
What Is a Vinyl Decal and How Do You Apply One?
Vinyl decals are a popular and versatile way to personalize everything from laptops and tumblers to vehicles, windows, walls, and business signage. Whether you're decorating your favorite water bottle or adding branding to your storefront, vinyl decals offer a durable, professional-looking solution that's easy to apply.
If you're looking for unique designs or personalized creations, you can order custom vinyl decals from Create Harmonee, where quality craftsmanship and attention to detail help bring your ideas to life.
What Is a Vinyl Decal?
Step 1: Clean the Surface
Before applying your decal, thoroughly clean the surface with rubbing alcohol or a mild cleaner. Remove dust, oils, and debris to ensure proper adhesion.
Step 2: Position the Decal
Place the decal where you want it and use masking tape to temporarily hold it in position. This allows you to check placement before making it permanent.
Step 3: Prepare the Transfer Tape
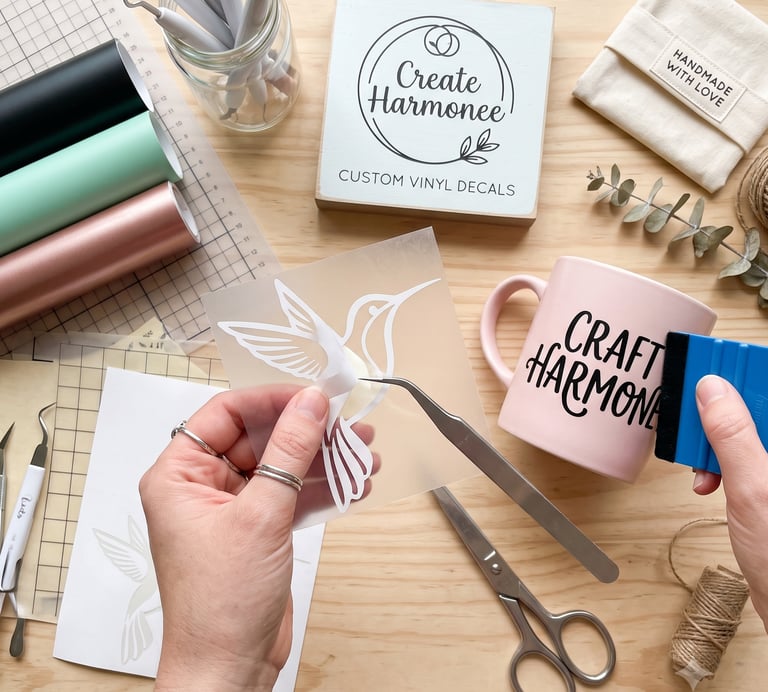
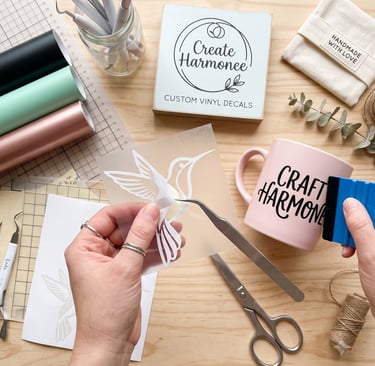
Most vinyl decals come with transfer tape applied over the design. Firmly rub the transfer tape with a scraper, credit card, or squeegee to help the vinyl adhere to the tape.
Step 4: Remove the Backing Paper
Slowly peel away the backing paper while ensuring the vinyl design stays attached to the transfer tape.
Step 5: Apply the Decal
Carefully place the decal onto your surface. Start from one side and gradually smooth it down to prevent air bubbles.
Step 6: Burnish the Design
Use a scraper or credit card to firmly press the decal onto the surface. Apply even pressure across the entire design.
Step 7: Remove the Transfer Tape
Slowly peel away the transfer tape at a sharp angle. If any portion of the vinyl lifts, lay the tape back down and burnish again before continuing.
How to apply a Vinyl Decals?
A vinyl decal is a design, graphic, or lettering cut from a roll of self-adhesive vinyl material. Unlike standard paper stickers, decals are made up of three distinct layers:
The Paper Backing: Protects the sticky adhesive side of the vinyl until you are ready to apply it.
The Vinyl Design: The actual graphic, logo, or lettering itself.
The Transfer Tape: A slightly sticky, usually transparent top layer that holds all the individual pieces of your design together in the correct layout as you move it from the backing to your final surface.
Because they are cut from a solid sheet of colored vinyl, they don't typically have a white or clear background like a printed sticker—the background is whatever surface you stick it to. They are incredibly durable, water-resistant, and perfect for everything from outdoor car windows to indoor handmade gifts.